Tiles make an excellent finishing material for bathrooms as they are water-resistant, durable, affordable, and low-maintenance. On top of all that, you have tons of options for beautiful designs. Here is our advice on how to tile a bathroom. You will find the list of all of the tools and materials that you need at the end of the article.
Before you start, make sure that your surface is ready for tilling. It should be sanded, cleaned, and sealed.
Before you tile a bathroom
Calculate the number of tiles needed
It is essential to work out the number of tiles needed for your bathroom. It will save you money as you won’t buy too many tiles, and ensures you have enough to finish your project. To do so, simply divide the area you need to cover by the area of each tile. Then, add 10% to the result to account for edges and breakage. Remember to allow spaces for grout gaps which are usually 2 to 3 millimeters.
The adhesive weight must also be included in your square meter calculation, especially if you tile the walls. The information for your calculation should be provided in the adhesive packaging.
Use the manufacturer required sealing and apply before grouting.
Plan your tile arrangement
Think about how you will arrange your tiles. If you go for a completely tiled surface, make sure to cut the tiles on each side of the corner equally. By doing so, you will avoid an untidy look.
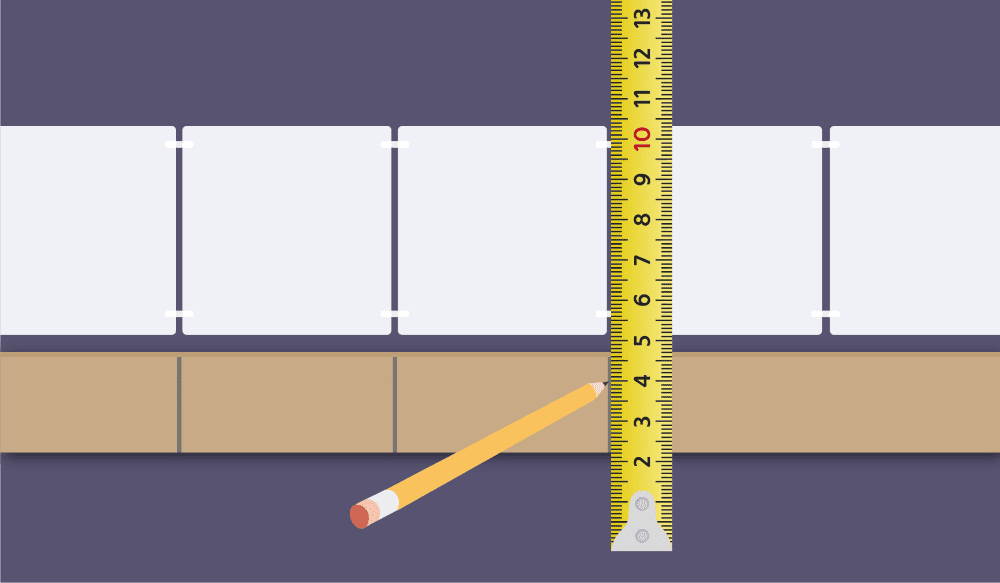
The best way to work this out is to make a tile gauge to check the position your tiles should be in. To do that, for example, you can take a piece of wood on which you mark the width of each tile.
Begin to tile the bathroom
When tiling, always start with the full tiles and then finish with the corners.
Applying the adhesive
First of all, you should bear in mind that the kind of surface you are tiling will dictate the kind of adhesive you need. You must always check the manufacturer’s instructions before starting.
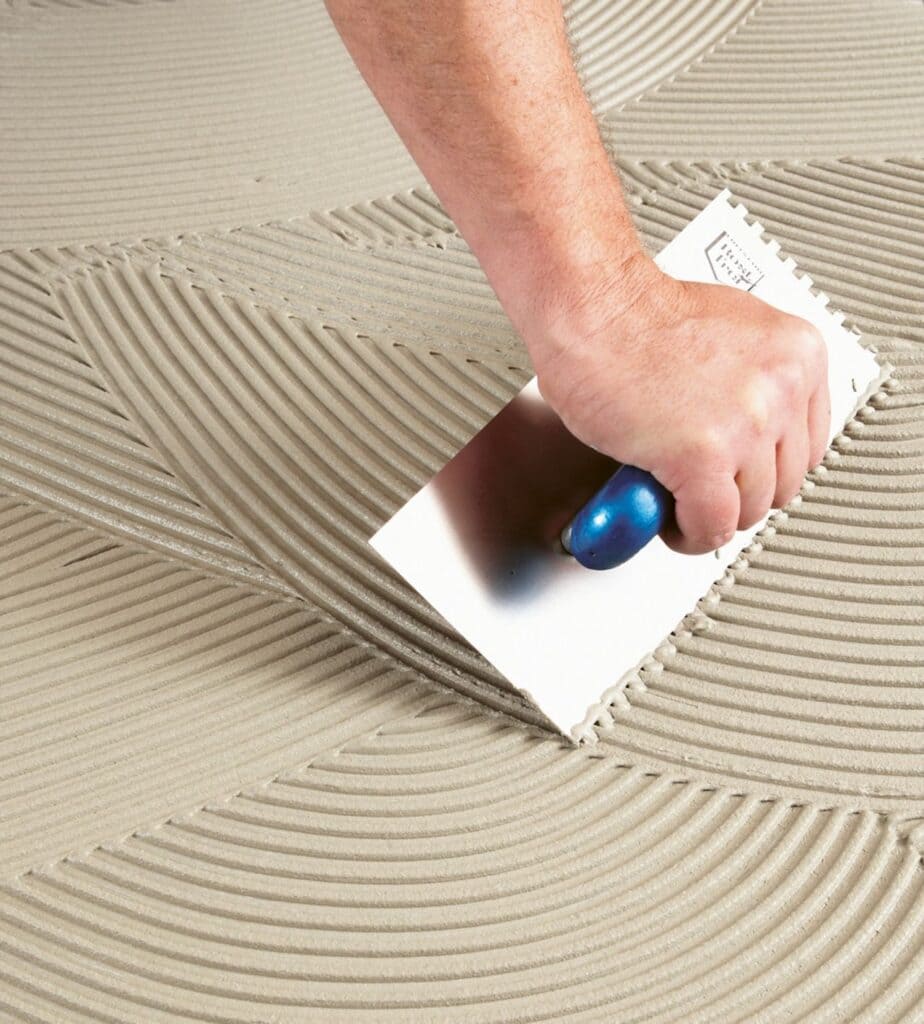
- Start by using a towel to scoop the adhesive to about a square meter.
- Then spread the adhesive with the notch spreader to get an even covering.
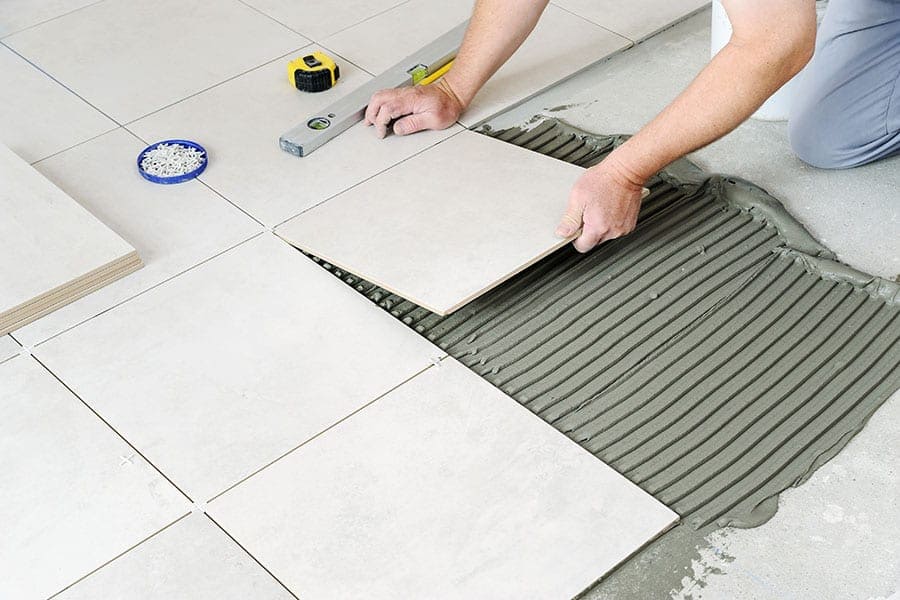
- Place the first tile alongside, slotting in space to ensure the right gap.
- Continue to place the tiles and make sure they are still aligned.
- Check regularly with the level that the tiles are flat and level. If they are not, you may have to remove the tile and add or scrape some adhesive off to even out the surface.
- Use a dampened sponge to remove the adhesive that might lay on the surface, and clear out any extra adhesive. If it has dried, use warm soapy water to remove it.
Tiling the corners
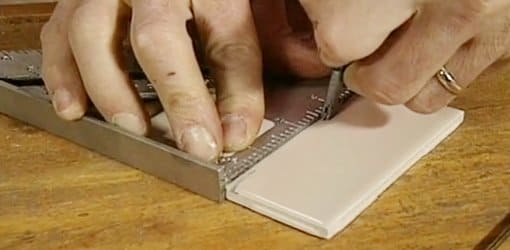
Now it is time to prepare the tiles for the corners. First of all, you need to cut the edges. There are plenty of methods to cut tiles, but the simplest and safest one is to use a tile scribe:
- Use a metal ruler and a pencil to mark a line across the tile.
- Then scrape along the mark using the tile scribe and the metal ruler.
- Make sure that the tile is scored all along to prevent it from shattering.
- Then to snap the tile, put something underneath it.
- Now apply pressure on the sides to split the parts. You could also rest the tile on the edge of a worktop and press on the sides.
Finish to tile your bathroom
- After you have checked that the cut tiles fit the wall, apply the adhesive directly to the wall. You can also apply it on the back of the tiles if spreading the adhesive to the wall is tricky.
- Use spacers to maintain the gap until the adhesive dries.
- Remove any excess hardened adhesive from the tile surfaces using a window scraper. Be thorough but do not scratch the surface of the tile.
Grout your tiles
Grouting is important to seal the tiles, making the surface water-resistant, and to finish the decoration.
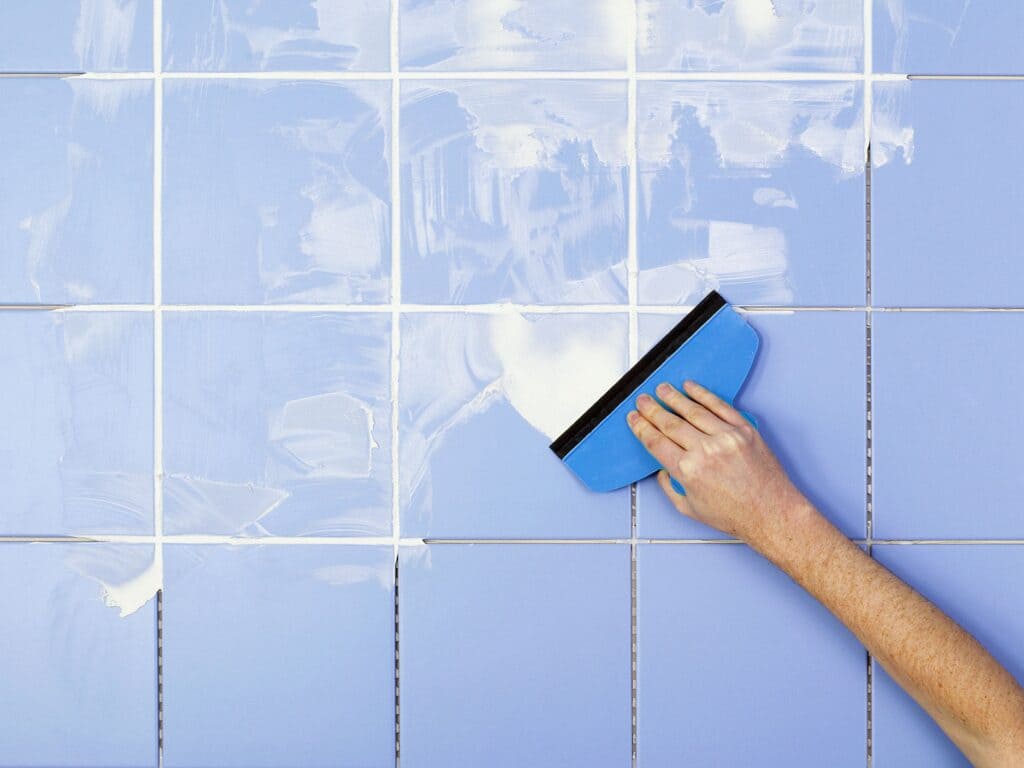
Grouts come in various colours, so pick the most suitable one for your bathroom’s design. You can use two types of grouts: mixed or powdered. If you use powdered grout, only mix up as much as you will use within the next 30 minutes. Any longer than this and the glue will begin to dry off, making work more difficult.
Carefully read the manufacturer instructions.
If you are using grout from old projects, make sure it is not expired.
- One way to apply the grout is to place a small amount onto the tiles with a grout spreader.
- Move it around and into the joints.
- Spread it using upward and diagonal strokes. Work swiftly as the grout will soon start to harden.
- Continue like this until you have grouted the entire area.
- Once you have finished, wipe the tiles with a damp sponge to remove any excess grout before it hardens.
- Then use a grout finishing tool to finish the joint and give a neat appearance.
The grouting should last for about 15 years. Nevertheless, you can use a grout protector that will extend its lifetime by creating a barrier on top of the grout pores. This barrier will protect it from water, dirt, limescale, and grease. It will also make the cleaning process easier. Here is our article on How to clean bathroom grouts.
While this article explains how to tile a bathroom entirely, methods can change based on which area to tile, for example, if you tile a bathtub. Do not hesitate to leave a comment or a question if some clarification on how to best do your tiling!
Tools
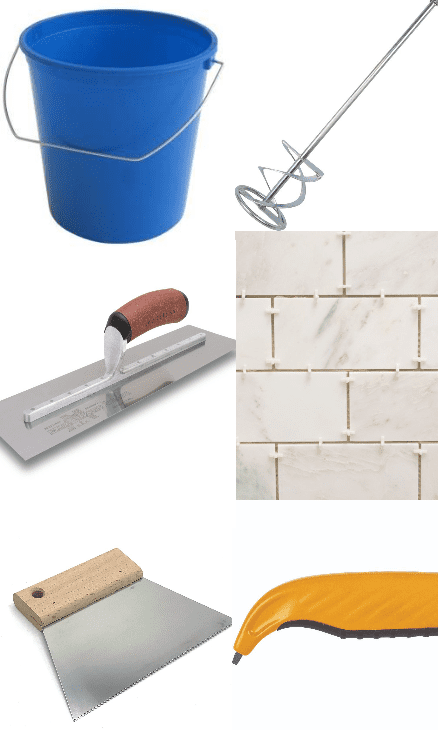
- Battens
- Bucket
- Mixing paddle
- Trowel
- Adhesive spreader
- Wall tile spacers
- Grout spreader
- Grout finishing tool
- Tile scribe
- Spirit level
- Tape measure
- Sponge
- Window scraper
- Metal ruler
- Cloth
- Pencil
- Safety goggles
Material
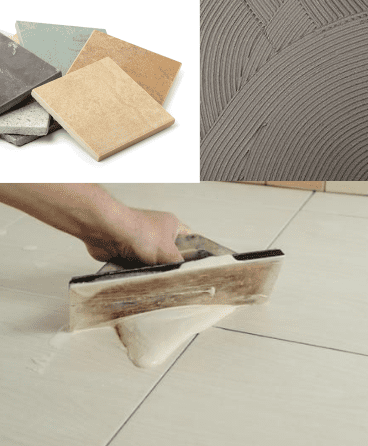
- Tiles
- Tile adhesive
- Grout
- Grout protector
- Tile trim
- Water
We hope that this article was helpful. If you have any questions, don’t hesitate to let us know in the comments.