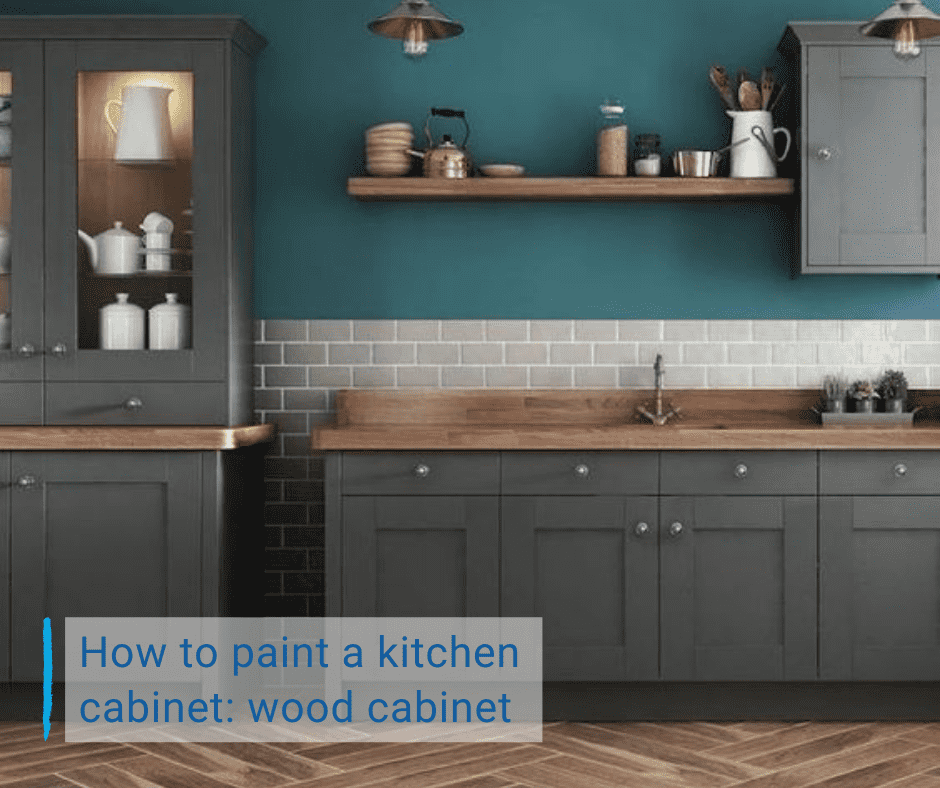
To give a new youth to your kitchen, it is not always necessary to spend a lot of money on changing everything. If you decide to paint your kitchen cabinets another colour, this already brings a fresh atmosphere. It is an easy change at everyone’s reach and can be done on every surface you can scuff with sandpaper. Here is how to paint kitchen cabinets.
Before we start explaining, you need to bear in mind that this project will take a couple of days.The first step will be to empty all of your cabinets
- The first step consists in emptying all of your cabinets.
- Then remove the doors, drawers and hardware, and label them to know which cabinet they go to. You will be glad that you did when reassembling.
If they are painted and that the paint is in bad shape, you want to make sure to strip it in a well-ventilated area. By doing so, you will start off with a clean and smooth surface.
- Once everything is cleared out, wipe down the cabinets with a damped cloth. You want to remove all of the dust and dirt.
- Once clean, check for any holes or imperfections that you will need to fill up. You can use a wood filler and apply it to the damaged area. Then smooth it out with a flexible putty knife. Make sure to read the instructions carefully and let it dry the advised time.
Prepare the surface
- First of all, use cloths and tape to protect your work surface.
- Then scruff your cabinets with sandpaper. You can use a medium or fine grit for this work.
- Scrub with the grain and get through the first layer of finish. Make sure to get all of the corners as well.
- Repeat the same process for the drawers and doors. Cabinet frames often have laminate signs. They are paintable as long as you sand. When doing it, be careful about not damaging the edges.
- Now clean up with a hoover and a tack cloth.
Paint the kitchen cabinets
Now that everything is prepared, you can start priming. Make sure not to load your brush too much but just enough to cover it.
- Move up and down with the grain of the wood and spread out evenly.
- When working on a larger surface, use a mini foam roller. Do not put a ton on it but enough to get it wet.
- Then move in a “W” motion with the grain. It does not have to look perfect but just has to cover.
- To paint the inside of your cabinet, start at the back, and work your way out.
Doors and door fronts
- First of all, find something to hold your door off the surface so you can get all the little details.
- Start with a brush and get all of the edges and the sides. Remember to go with the grains.
- Then go back with your foam roller and hit all of your larger areas.
- Wait for the sides to be dry and flip it over on the front.
- Repeat the same process.
Drawers
When painting the drawers, only paint the front, avoid the sides as it will cause the drawers to stick on the frames.
Exactly like before, use your brush to get all the angeled areas. Primer doesn’t take long to dry, but always check the manufacturer instructions before you do anything else. For a smooth finish, you may have to sand the surface between your primer coat and finish coat.
To paint your kitchen cabinets, try to avoid flat finish as it is tougher to clean. Now to paint the surface, you are going to go through the same process as with the primer. Do not forget to lay off to remove the tool marks. If you want to add more durability, you can put a coat of polyurethane. However, if you do so, make sure to use a water-based one over the acrylic latex paint.
Wait for your paint to harden, and reassemble your cabinets.